


Introduction to Wet Sanding Your Bass Boat
A. Understanding the Importance of Wet Sanding
Wet sanding is the process of sanding the exterior of your bass boat with wet sandpaper to remove scratches, swirl marks and other imperfections on the surface of the hull. It is a vital technique for any bass boat owner who desires to restore the boat’s shine and looks as new. Wet sanding should be done at least once a year to keep your boat looking like new and also prevent costly repairs.
B. Benefits of Wet Sanding for Bass Boats
Wet sanding offers several benefits for your bass boat. When done correctly, it can remove all the blemishes on the surface, including stains, color-fading, and scratches that dull the boat exterior and impact resale value. By restoring a mirror shine to your bass boat, wet sanding will make it look new again, and it will feel good to show it off to neighbors and friends. Finally, by regularly wet sanding your boat, you reduce the likelihood of requiring any major repair, which can be expensive and time-consuming!
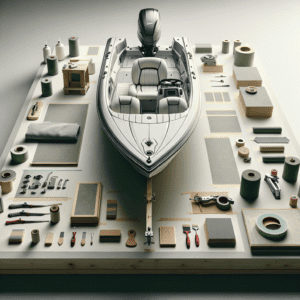
C. Necessary Tools and Materials for Wet Sanding
To do the job right, you’ll need a few essential tools and materials. These include sandpaper, a spray bottle, a hose or bucket for water, appropriate safety gear such as goggles and gloves, a plastic tarp, and covering tape. When selecting sandpaper, you’ll need to use automotive-grade sandpaper and choose the appropriate grit based on the condition of your boat’s surface. To make the process more comfortable, you might also consider using an electric sanding tool.
D. Safety Precautions to Consider
Before starting the wet sanding process, make sure that you take all of the necessary precautions. This includes wearing gloves and goggles, using the proper face mask or respirator, and ensuring that you have proper ventilation. In case your skin comes in contact with water used for wet sanding, wash it with soap and water immediately. You should also take care not to wet sand near sensitive areas, such as electrical connections, critical hardware, or fuel lines to avoid any damages or malfunctions.
Preparing Your Bass Boat for Wet Sanding
A. Cleaning the Boat’s Surface
Before beginning the wet sanding process, it’s important to thoroughly clean the surface of your bass boat. This will ensure that you don’t accidentally scratch the boat during the sanding process. Start by washing the entire boat using a high-pressure hose to remove any dirt or debris that may have accumulated.
Once the surface is clean, use a marine-grade soap to wash the hull and deck thoroughly. Use a soft-bristled brush to gently scrub the surface but be careful not to be too harsh as this could damage the gel coat. Rinse the boat well to remove all traces of soap.
B. Assessing the Boat’s Condition
Once the boat is clean, it’s time to assess its condition. Pay close attention to any areas that may require extra attention during the sanding process. Look for any cracks, gouges, or other damage that may require repair before sanding.
If there are any areas that need repair, take care of those first before moving on to sanding. This will ensure that the repaired areas are smooth and ready for sanding.
C. Taping and Covering Sensitive Areas
Before beginning to sand, use painter’s tape and plastic sheeting to cover any sensitive areas like decals, trim, or rubber molding. This will ensure that those areas are not damaged or marred during the sanding process.
D. Choosing the Right Sandpaper Grit
Choosing the right sandpaper grit is crucial to ensuring a smooth and even finish. Start with a coarser grit, like 100 or 150, to remove any deep scuffs or scratches. As you move on to finer grits, like 220 or 320, the surface will become smoother and more polished.
Remember to use a sanding block to ensure even pressure is applied across the surface. Generally, it’s best to work in sections, starting with the bottom of the boat and moving upwards.
By taking the time to properly prepare your bass boat for wet sanding, you’ll get the best results possible and a well-maintained boat that looks great on the water.
The Wet Sanding Process
Wet sanding is an essential technique if you want your bass boat to look and feel as good as new. It involves sanding the painted surface with water to even out any imperfections and scratch marks. Here’s how to do it:
A. The Technique of Wet Sanding
Wet sanding is different from dry sanding, as it involves wetting the sandpaper and the surface you want to sand. This prevents the buildup of roughness on the paper and ensures the surface doesn’t get hot and damaged. Use a bucket of water and a sponge to wet the surface, then dip the sandpaper into the water and start sanding.
B. Working in Sections
It’s best to work in small sections, approximately two square feet at a time. Sand in diagonal strokes, covering all angles of the surface to ensure the best results. Every time you complete a section, wipe it down with a clean cloth to check for any cracks or deep scratches that need more attention.
C. Sanding the Hull
The hull is the most critical part of the boat, as it is directly exposed to water and weather elements. Start by sanding the hull with 320 grit sandpaper, and gradually work your way up to 2000 grit for a smooth finish. Be careful not to put too much pressure on the sandpaper, as this can damage the paint job.
D. Addressing Tough Spots and Scratches
If there are tough spots or scratches that won’t come off while wet sanding, don’t panic. You can use a rubbing compound to buff out the imperfections. Apply the rubbing compound to a clean cloth and rub it in until the tough spot disappears. Repeat the wet sanding process over the area to ensure that it is smooth and even.
By following these techniques for wet sanding, you can make sure that your bass boat is looking sleek and clean for all your upcoming excursions.

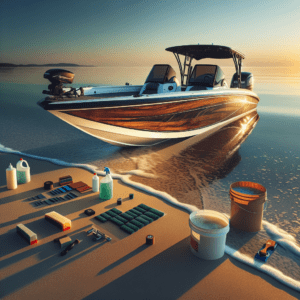
Refining and Polishing After Wet Sanding
After completing the wet sanding process, it’s time to refine and polish your bass boat for that high gloss finish. This step is crucial to achieving a pristine look on your boat and to protect it from further damage.
Rinsing and Cleaning the Sanded Areas
Start by rinsing the entire surface of your boat with a hose or pressure washer to remove any residue left behind by the sanding process. You should also use a non-abrasive cleaner to wash the boat’s surface. Make sure to rinse it clean after you finish washing it.
Applying Polishing Compound
Once the surface of the boat is dry, apply a polishing compound with a soft cloth or buffer pad. This will help eliminate scratches or blemishes that are still visible and create a hard, glossy finish. Make sure to apply the compound in small areas, working in circular motions.
Buffing for a High Gloss Finish
Now, it’s time to buff your newly polished boat. Use a buffing pad or a clean, soft cloth to buff the entire surface of the boat in circular motions. This will bring out the shine and create a flawless, high gloss finish.
Waxing for Protection and Shine
Finally, for long-lasting protection and shine, apply wax to the freshly buffed surface with a soft cloth. This will protect the surface from any further damage and make it easier to clean in the future. Remember to buff the wax off the surface with a clean cloth.
By following these steps, you can achieve a pristine and protected surface which will make your bass boat stand out. Remember to protect all the detailing work by following the maintenance tips for your newly-refined bass boat.
| Steps | Details |
|---|---|
| Rinsing and Cleaning the Sanded Areas | Use a non-abrasive cleaner to wash the boat’s surface, and rinse it clean after finishing cleaning the surface with a hose or pressure washer. |
| Applying Polishing Compound | After the boat is dry, apply a polishing compound on small areas in circular motions that will help eliminate blemishes and create a glossy shine. |
| Buffing for a High Gloss Finish | Use a buffing pad or a clean, soft cloth to buff the entire surface of the boat in circular motions, creating a flawless, high gloss finish. |
| Waxing for Protection and Shine | Apply wax to the freshly buffed surface with a soft cloth, protecting it from future damage and making it easier to clean. Buff the wax with a clean cloth. |
Maintenance Tips to Keep Your Bass Boat Shining
After all the hard work put into wet sanding your bass boat, it’s important to maintain its shine and keep it looking sleek for as long as possible. Here are some maintenance tips to follow:
A. Routine Cleaning and Care
To keep your bass boat shining, you should clean it regularly. Use mild soap and water, and avoid using abrasive cleaners that can damage the boat’s surface. Make sure to rinse the boat thoroughly after washing it. Use a soft cloth or chamois to dry it and prevent water spots.
B. Regular Inspection and Touch-Ups
Inspect your boat regularly to identify any areas that might need touch-ups. Addressing small scratches or damages quickly can prevent rust and corrosion from developing. Have touch-up paint and sealant on hand to make repairs quickly and easily.
C. Protecting Your Boat from the Elements
Exposure to the sun and weather can cause damage to your boat’s surface, leading to dullness and discoloration. It’s essential to protect your boat by storing it in a covered area or using a boat cover when not in use. This will protect the finish and prevent moisture from causing damage.
D. When to Reapply Wet Sanding Techniques
Eventually, your bass boat will need another wet sanding treatment to maintain its shine. However, how often you need to reapply depends on factors such as how often you use your boat, storage conditions, and climatic conditions in your area. A general rule of thumb is to reapply every two to three years.
FAQs
- Q: Can I use any sandpaper for wet sanding my bass boat?
A: No, not all sandpapers are suitable for wet sanding. Use silicon carbide wet/dry sandpaper with at least 1,000 to 2,000 grit for wet sanding your boat.
- Q: Do I have to wet sand my boat every year?
A: It’s not necessary to wet sand your boat every year. The frequency of wet sanding depends on factors such as your usage, storage conditions, and the climate in your area. Typically, you can wet sand your boat every two to three years to maintain its shine.
- Q: Can I use dish detergent to clean my boat?
A: It’s recommended to use a mild soap and water mixture to clean your bass boat. Avoid using abrasive cleaners and harsh chemicals that can damage the boat’s surface.